| 1. Two Platforms | 2. Two Tracks | 3. Basic Network |
Railway construction: Road construction: Waterways construction: Airport construction: General construction: Working with vehicles:
Two Platforms
Now that you have built your first railway, you may want to expand it with more trains and more platforms.
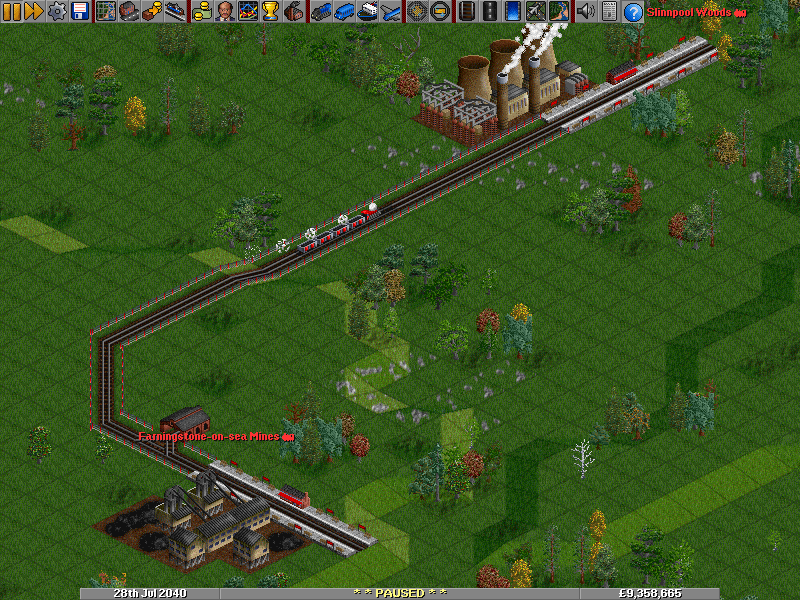
From the previous tutorial you should have a railway that looks like the picture below.

|
|
Two stations, some track and a train (click to enlarge) |
This example is used since both stations easily fit in a single picture. In your game, you can have a much longer track, or put your platforms down in a different manner.
Adding a second platform
A disadvantage of the above layout is that the tracks and the stations are not used very efficiently. You are paying a large sum of money for maintaining all those tracks, and it can only be used by one train! If the output of the coal mine is high enough, you may want to add an extra train. Always having a train ready to load will increase your station rating which will lead to more of the industry's output being delivered to your station. And more is better, right?
Before you can add this extra train, you need some space for it in the station by the coal mine. That way, when one train is loading the other train can go to the power plant to unload and come back. When that train returns, the other train can go and unload while the first train is loading again.
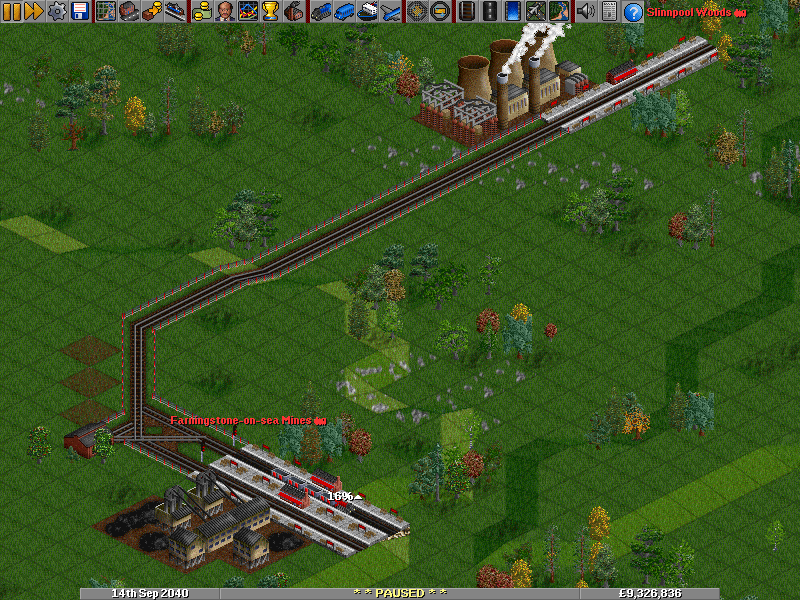
Hopefully you still remember how to build a station and tracks. Go ahead and build an extra platform next to the original coal mine station. As long as the new platform touches the original station, it will be added to that station. Also, build some track to connect the new platform to the existing track. Leave at least one piece of straight track in front of each platform as we'll be placing signals here later. Make sure both platforms can be reached from the depot. You can blow up the original depot with the dynamite tool if it's in the way and build a new one elsewhere.
Adding signals
Before you can run the second train you need to make sure that it doesn't collide with your existing train. Signals prevent trains from crashing into each other, so we need a couple of those things.
Click the  Build Railway Signals button from the railway constuction toolbar. This will open the Signal Selection toolbar.
There are six different types of signals in OpenTTD. Fortunately, almost every need can be met by only two of them. These signals are called Signals, and are by far the easiest to use. For now, you can just ignore the other four signal types.
If you already looked at the signal selection window, you may have noticed not six but twelve signal buttons. The upper six are semaphore signals and are functionally the same as the light signal counterparts below them. The semaphores just look different and give your track a more classical look. For the tutorial, we'll only be using light signals as they are more easy to distinguish. You're free to use either in your games.

|
|
Path signals |
The path signals are marked in the image of the signal selection toolbar at the left. The leftmost of the two path signals is the so-called two-way path signal. Trains can pass this signal from both sides, but will only obey the signal if the train driver can 'see' the light from the front. The rightmost signal with the horizontal red bar is the one-way path signal. It behaves the same as its two-way counterpart, but trains can only pass it from one side (the front).
These path signals are smart signals, as they consider the route a train wants to take. As soon as a train encounters a path signal, it will "reserve" its route to the next signal. A second train will be allowed on the same junction as long as its route (or path, hence path signals) does not cross the reservation of other trains on the junction. If it needs to cross a reserved path, it will wait at the signal until it can make its own reservation. Having said that, there's one important rule to keep in mind: only place signals where you want a train to be able to wait. We'll be looking into this in more detail later. If you cannot follow this reservation business right now, just continue and do the same things as done in the images.
Now select the  two-way path signal. Click the first piece of track in front of the platform to build the signal there. Make sure the signal faces the platform; you may need to click the tile a second time to turn the signal around. Repeat this for the other platform.

|
|
The second platform equipped with path signals (click to enlarge) |
Do you need a signal in front of the depot as well, you ask? No, depots have built-in signals, so there's no need for that. Elsewhere you also may have read that you don't even need path signals in front of stations. While that is true to some extent for terminus stations, it isn't for through stations. If you're new to OpenTTD signalling, it's recommended to place signals in front of terminus stations anyways. Besides looking nicer, you can easily make a terminus into a through station later without forgetting to add the signals and having to ask why it doesn't work.
Adding another train
Now everything is ready to add the second train. Click the depot to open the depot window. One way to purchase the second train is exactly the same way as you've purchased your first train. However, if you want the second train to be identical to the first train, including its orders, click the Clone Train button at the bottom of the depot window. Next, click the first train. An identical copy of the first train (including orders) will be placed in the depot and now you only have to start it.
In addition to this, if you hold the Control button on the keyboard while clicking on the first train to clone it, the orders of both trains will be shared. This means that when you change the orders of one of the two trains, the orders of the other train will be changed automatically as well. This might be useful in the future if you ever want to edit orders.

|
|
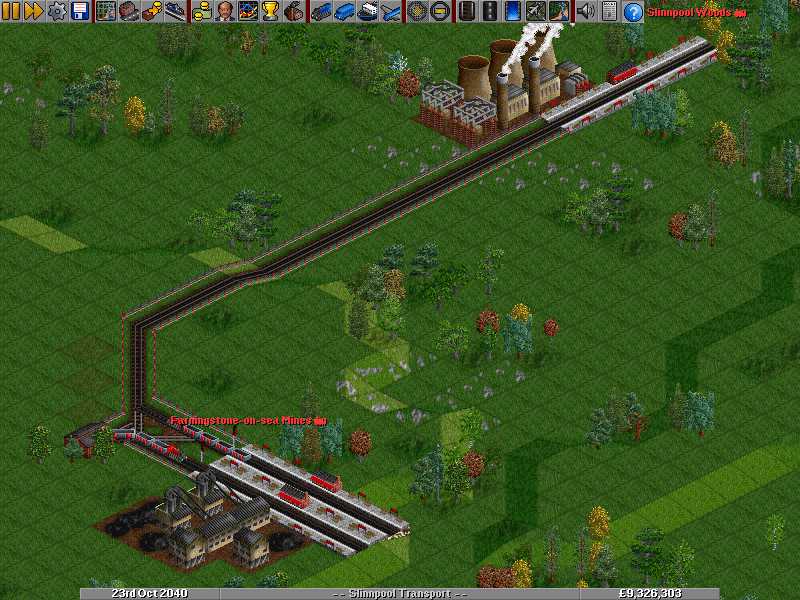
Mine station with two platforms and path signals in action (click to enlarge) |
Now you have two trains on the same route. Good job! You may have noticed that some parts of the tracks in the screenshot above have a darker colour. This is a feature to show each train's path reservation. Now this feature is disabled by default, but you can enable it from the Advanced Settings > Interface > Display options > Show reserved tracks.
Next: Using two tracks »


