- Signals · Stations · Junctions · Carrying capacity · Rail Designs & Tips
See the Building signals tutorial for instructions on how to carry out signal construction.
This page is very outdated and has not properly been updated to reflect that path signals are considered the default choice for many years, and the other signal types are legacy for savegame compatibility.
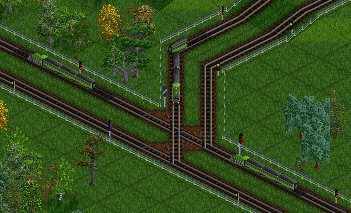
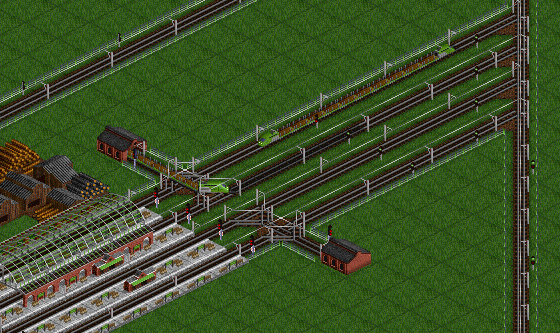
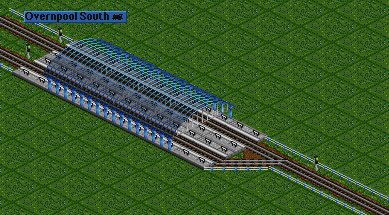
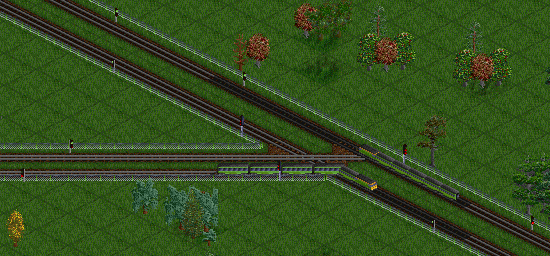
Railway construction Signals are useful devices that allow you to control Trains movement. They do this by preventing trains from entering areas where other trains might be, and so preventing them from crashing. This usually involves taking information from the section of track following the signal. The most useful type of signal is the path signal which allows trains to reserve and share track sections. The two legacy types of signal are block signals, which simply deny access if the section has any trains, and pre-signals, which operate similarly, but also require there to be an available exit from the section.
Contents |
Path signals

Two new signal types in the Signal GUI.
There is a signal type, "path signal", to overcome the limitations of the original block based signalling of Transport Tycoon. These signals enable trains to reserve a path through a block until the next signal, before entering the block. If another train wants to enter the block, and succeeds in reserving a path through the block, the path signal authorizes the train to enter the signal block, even if another track of the block is used at the same time, which is impossible with the traditional block signals only and/or pre-signals setup. It is entirely possible to build a sophisticated railway network with path signals only due to their better ability in preventing junction deadlock.
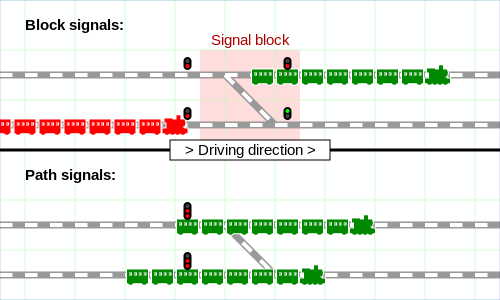
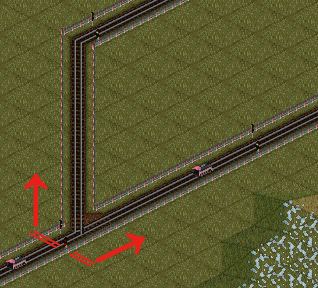
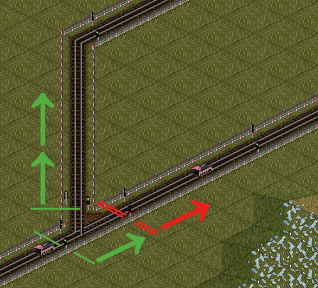
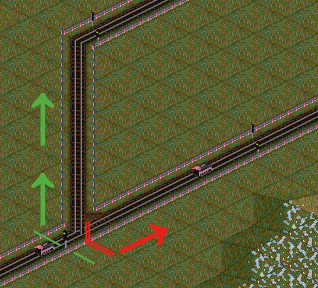
The most important difference between block signal setup and path signal setup as shown in this example: two parallel tracks are connected by a crossover.
- In the block signal setup, the signal does not authorize the lower train to enter the signal block because it is currently occupied by the upper train, even though there is absolutely no risk of letting the lower train pass through it.
- In the path signal setup, the lower train is authorized to pass through the junction as long as the upper train does not switch path from upper tracks to lower.
Path signalling is an attempt to simulate a more realistic path based signalling (PBS) system because:
- Real signal is constantly red and only green temporarily when a train approaches in front of it and the path ahead does not collide with the path of another train. In a realistic junction setup, it is possible to allow multiple trains in the intersection of same block to pass-by safely due to switch railroad switch limiting which side of the junction the train can turn to.
- Exit-signal (either the generic block signal or exit-signal in the pre-signal setup) immediately after the intersection which is used to quickly free the intersection block for another train to enter in Transport Tycoon does not exist in real world signalling system because of the risk of the train getting stuck right on the junction, creating a deadlock.
- A single signal facing one side is not necessarily one-way in the real world (unless player is using the "one-way path signal" specifically to limit the passing direction). Train can still pass through the track with signal from behind as if there is no signal. As mentioned in the previous point, exit-signal does not exist in the real world. This is particularly important for a station with single sided entrance/exit in front of a junction, (non one-way) path signal is placed in front of the station exit, facing the station side.
Here is an example as illustration:
There are two things you should know about this signal:
- Place it only where trains can stop and wait without blocking junctions ;
- This signal only works in one direction. In the other direction, it is either ignored or considered a one-way signal, depending on the signal path (see below).
Most of the time it will be sufficient to use a default path signal, as passing a path signal from the back is penalised by the pathfinder, unless the destination (station or waypoint) is right after the path signal facing backward. However, one-way path signals might be useful in certain specific cases.
The two new signal types behave a bit differently than standard block signal types. The path signals are red by default, and will only show green as soon as a train can reserve a path to the next safe waiting position on its route. Safe waiting positions are - by definition - in front of signals, depots and track ends. The back of a path signal is not considered a safe waiting position, and therefore paths are reserved through these signals.
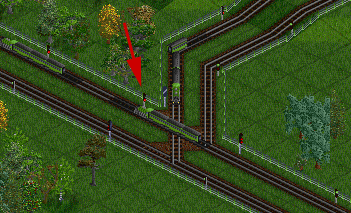
Because the front of every signal is defined as a safe waiting position, you would normally not want to place a signal immediately behind a junction, only in front of a junction. This is because it is only safe for a train to wait in front of a junction. It is not safe for a a train to wait at a signal immediately after a junction before the whole train has cleared the junction, as it would be blocking the junction while waiting, as illustrated in the example below. This is a major advantage against traditional block signals, where you had to place signals before and after junctions, which caused trains to block junctions while waiting.
| Bad: The signal indicated by the arrow is a bad waiting location, as the train in the junction now blocks the otherwise free path of the train coming from the top. There's a second bad waiting location in this picture. Can you find it? | Good: Here there is enough space after the juction for a train to wait. As long as this space is unavailable, the next train will wait before the junction rather than blocking it. This allows the train coming from the top to proceed. |
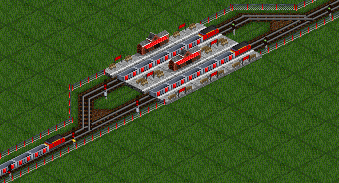
This is one other example of what you can do with those path signals. This works far better than using pre-signals because you can have two trains leaving the station at the same time AND share the same depot (there is no way to make it with pre-signals, because of the block share). In this case there are one-way path signals for trains leaving the station, and simple path signal for trains leaving the depot.
Although the screen shot above does not show, it is unnecessary to place any signal between the pass-through station entrance and junction (effectively an "exit-signal" in the traditional block signal setup) if the signal of entrance tracks in front of the junction is path signal.
Advanced Settings
There are three Advanced Settings related to path signals.
One option is to highlight reserved tracks. This option is useful to troubleshoot your path-signaled junctions, as you can see what paths trains have reserved through a junction.
The other two options control how the build signal tool should behave. You can set the signal type which should be built by default when building a new signal with the signal tool and change which signal types should be cycled through on ctrl-clicking an already existing signal.
There are a few more path signal related options which are not available through the Advanced Settings window. What these options are, and how to edit them is covered under Advanced path signal options & features.
Basic examples of path signals
Below are some example track layouts which use the path signals. There are also Advanced track layouts that are not recommended for beginners.
Basic junction
This basic junction now has a much higher throughput because trains only have to wait for trains running on the same line. The train coming from the right (going up) would usually have to wait for other trains coming back from the left tracks. It would now only have to wait if it wishes to switch lines. Note the 6 bounding signals to the 'junction block', and 3 total path signals, one at each entryway.
Basic two-way station
With this station layout, trains can use both platforms when coming from either direction. Because path signals do not create blocks on their reverse, the train cannot enter until there is a clear path until the signal on the opposite side of the platform (which must include the platform space), allowing it to safely stop. Note that this setup could alternatively be replicated with a set of block-exit presignals in-front of the station.
☑
☑
☑
☑
☑
☑
Legacy Block signals
Block signals divide tracks into blocks, and operate according to the train movement on the blocks. Block signals stop the train if the next block of track is occupied by a train, and show red. If not, it allows it to pass and is green. Any and all track tiles physically reachable from the signal up to the next signal on that track are counted as the same block, regardless if there are multiple branches. Even if the expected path of the train does not collide with the path of the other train which is currently occupying the block, the block signal will not authorize the train in front of it to enter the block ahead, as opposed to path signals.
Two-way signal
Two-way signals are used in a railway that has trains moving in both directions on the same track. The most common use is at end-of-line stations, where trains enter and exit the same end of the station. In the example at the right, the signals direct the next train to come into the empty loading bay. They also prevent the train from leaving the loading bay if another train is in the way.
If a train has a choice of two or more directions, each with two-way signals on them, it will choose the direction with a green signal. If all signals are red it will pick the easiest direction and wait for the signal to change.
Two-way signal was the very first and only railway signal introduced in the original Transport Tycoon Deluxe.
One-way signal
One-way signals limit train movement to one direction. In the example below, the signals force the trains to move in a circle.
There are two main situations where these signals are more useful than simple block signals:
- RoRo stations allow trains to stop at a station without reversing out and blocking the entry. This makes trains enter and exit stations more efficiently.
- Double tracks allow more than 2 trains to travel without them reversing into each other. On a single-track line, if a train is present, then no trains can move in the opposite direction because they will collide at some point. On a double-track line any train can take one direction and they will never collide, meaning trains don't have to wait for other trains, and can always move on that line.
If a train arrives at the wrong side of a one-way signal, it will be blocked and immediately reverse unless player has disabled this behavior in the advanced signal options. When using one-way signals, be sure that they are all facing the correct direction. It is a good idea to watch the first train you run on the newly signaled line all the way to its destination to ensure you haven't made any mistakes.
Click on an existing two-way signal to toggle it to a one-way signal. Click on it again to change its direction (leaving it one-way); the third time will revert it back to a two-way signal.
If a train has a choice of tracks, each with a one way signal, it will pick the track heading towards its destination (i.e. it will wait until the signal on the track heading towards its destination turns green, as opposed to taking whichever signal is green if one of the signals is red). This is in contrast with two way signals.
Although the one-way (block) signal appears there is only one side of the signal facing the passing direction, technically speaking, the disappeared signal of the other side still exists and is red permanently to block the entrance from that side. This appearance is not true in the real world signalling system and is misleading for players who wish to learn the usage of the more advanced path signalling system which is more realistic and efficient in handling junction traffic.
One-way signal was first introduced to Transport Tycoon Deluxe.
Legacy Pre-signals
Pre-signals are a group of specialised block signals. They are so named because block entry pre-signal input comes from not just the track in the block, but any other pre-signals placed on the other side of the block (that is to say exits from that block). They are used to limit the entry of trains into blocks that cannot be obstructed or occupied. In most cases you can use path signals to solve situations where trains can choose between multiple alternatives, for instance at stations or single-track lines that are used by trains in both directions.
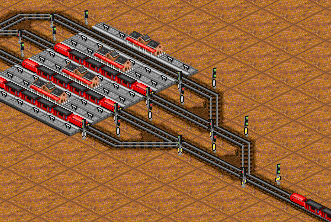
The image on the top right shows a setup where entry to a station is controlled using ordinary signals. When at least one platform is empty, this works well, as an incoming train is always directed to a free platform. However, consider what happens when all platforms are full, as in the screenshot. All branches are showing red, so the incoming train picks the shortest path - straight on. But suppose the train on the platform to the right is going to be in the station for some time. Meanwhile, the train on the left leaves. The incoming train has committed itself to a platform and is stuck between the signals, waiting for a train to depart even though there is now an empty platform available. We need to stop that incoming train before the track splits so that it picks the empty platform when a train leaves. For this you can use path signals, but you can also solve this situation with pre-signals. In fact, this was the way to build stations before path signals were invented.
Pre-signals function as block signals, but additionally decide on which colour to show by the status of other pre-signals in the same direction down the track. Specifically, an entry pre-signal allows trains to enter if, and only if, there is at least one green exit out of the adjacent/following block. You, as the planner, need to identify which signals are to be the block entry pre-signals and which are to identify exits.
Block Entry Pre-signal
An entry pre-signal checks the signal aspect of all exit pre-signals of the signal block following the entry pre-signal. If there is at least one green exit pre-signal, the entry pre-signal wil also show green. If all exit pre-signals of the next block are red, then the entry pre-signal is also red.
This prevents trains from entering the block and obstructing it until there is an available exit. Note that depots have a built-in two way signal (it works as an entry pre-signal in a pre-signal set).
If there are no signals designated as exits on the block directly behind the entry pre-signal, it behaves as a normal block signal. This is convenient for bi-directional pre-signals where only one direction needs pre-signal functionality.
Block Exit pre-signal
The exit pre-signals are what an entry pre-signal looks for to decide what aspect to show. They otherwise behave in the same way as a normal block signal.
To summarize: in the direction of travel you first have an entry pre-signal, then a junction where the track splits in at least two directions. After the junction there is an exit pre-signal on each branch. If the first block of each branch after the junction is occupied, then no trains will be allowed onto the junction. If at least one branch is available, then the junction will be available as well. Note that trains still can choose the occupied branch, if that is the only route to its destination. If both branches lead to the destination, then the train will choose the branch that is not occupied.
Combo-signal
There is a third type of pre-signal called the combo signal and simply acts as both an entry and exit signal. They effectively combine many exit signals into one signal, effectively copying their effect down the chain. Any one green exit signal will make any combo signals up the line become green, which will successively relay up to the original block entry signal. This allows you to build large "trees" of pre-signals spanning several blocks, as shown on the right.
In a tree of pre-signals, combo-signals are placed in between the entry pre-signals and exit-signals for that reason above, the other 2 types of signals are placed at the very beginning and end of the setup respectively.
Building pre-signals
To build a pre-signal select the appropriate button in signal selection toolbar.
In previous versions, first place an ordinary signal. Then, with Ctrl held down, click the signal to cycle through the different kinds of presignal:
- Note that you can build one way pre-signals in the same way as you build ordinary one way signals. Remember: holding Ctrl and clicking toggles the type of (pre)signal, clicking without Ctrl changes the direction of signaling - if interface signals not enabled.
- Remember not to hold down Ctrl when placing the signal initially or you will end up with a semaphore (see below). Also use Ctrl if you have enabled the signal interface.
Limitation
An important point to note with exit signals is that a green exit signal will trigger a green on the entry pre-signal at the beginning of the block even if it is not actually possible for a train to get to that exit signal because of the track layout (as in the image to the right with a train entering on the bottom track cannot technically exit from the top track). This can ruin more complicated pre-signaling setups, so care needs to be taken with planning.
One of the bugs that are noted as "will not be solved" is: lost trains ignore (block) exit signals. If trains are lost, a random direction is chosen at each junction, so they ignore block exit signals, and may easily block junctions with pre-signals. Such case, however, can be easily resolved by replacing with path signals.
Directing trains
Signals are intended to prevent trains from crashing into each other, and to help them choose between several track sections to the same destination. If you want to direct a train to a particular destination via a certain route, you should use Waypoints.
Signals in the game versus Signals in real life
Just as in game, trains in real life uses a block system where each length between signals is indicated as a block, but is most often limited to one track. The difference between the signaling systems, is that real trains uses signals that is connected to a large computer network (signalling control) rather than being dependent on block-by-block occupation.
There is a somewhat heated discussion between players saying that the signal system is realistic to its real life counterpart, but the differences are very clear. Real life signalling control takes all the blocks after a signal into account as to prevent a train from driving into a dead end or over to the wrong track, based on the information on all preceding trains. Some of the differences between the trains in the game and real life is that the deceleration is completely different, requiring a 52 coach train more than 2 kilometers in distance to come to a complete halt depending on the speed, weight and inclination of the ground.
Real life signals uses a combination of main signals, distant signals and dwarf signals to handle traffic load and many countries' signal systems have different signals to indicate more than just a simple "Stop" or "Go".
Here's an example:
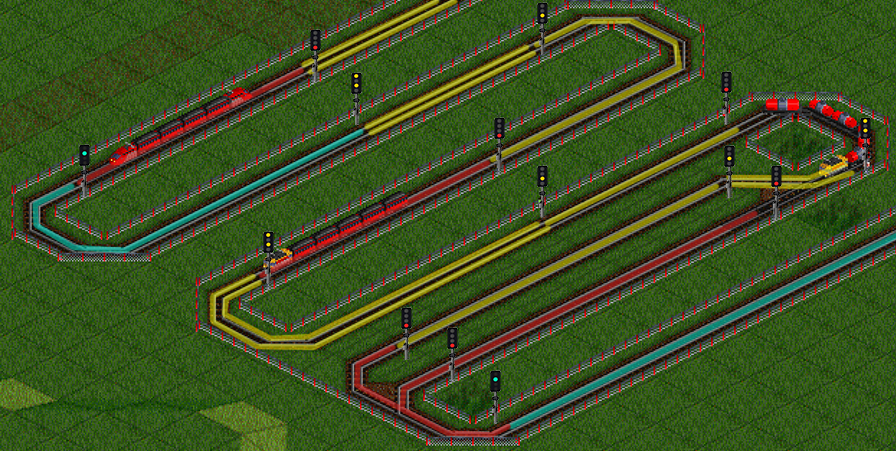
On the picture on the right is an in game example using real signals instead of the in game ones. The fastest train is catching up to the second train and the second train is catching up to the first. The UK railway signal system would indicate to the driver that the two blocks ahead of the train is red, by giving a double yellow. The single yellow tells the train that the next signal in the next block will indicate "Stop". By using this kind of three step system before a complete stop, the driver can slow down the train but doesn't have to bring the train to a complete stop.
In OpenTTD, the fastest train would catch up to the slowest, forcing it to come to a complete halt for the next block that the slow train is occupying. This then forces the fast train to start from a standstill and eventually catch up with the slow train again and repeat the process. In reality, this would be a big waste of energy and the breaks of a train as it takes an enormous amount of energy to start and generates a lot of heat to stop.
The game is also not programmed to make the slower train shunt on to a side track and allow the trains to pass unless you use time tables and waypoints to manually create this event.
When inside a train yard (the area with many tracks found outside stations and loading areas), trains uses dwarf signals instead of block signals. The dwarf signal resembles the in game path signal as it requires the driver to request permission to pass it if the junction ahead is not completely clear. Dwarf signals may also allow a train to pass over an occupied junction on its free track even if a train is blocking the parallel track.
There is also no real life equivalent of the entry signals, combo signals or exit signals. The signalling control system will indicate green when a train is allowed to go into the next block based on trains' schedules. After exiting a track of block signals entering for example: a station, dwarf signals are used to give instructions on which track to shunt to.
The biggest comparison between the game and real train signals is that the game is a "control free" system based on workload and occupation, whereas the real life signal system is automated to be able to create much more complex tasks and handling of trains as to allow a fluid movement. The in game system also does not require any interaction from the train driver since the signals handles all the commands whereas in real life, train drivers have much more to say to the control system and can request complex routes.
Read more about real life train signals on Wikipedia:
Dutch railway signaling, designed to be one of the simplest in Europe
North American railroad signals
See Also
- Examples of advanced presignal setups
- Building depots
- Train Junctions for examples of complex junctions that take advantage of pre-signals.
- Signals for the complete beginner
- A tutorial written by domsson, on the forums here


