| 1. Two Platforms | 2. Two Tracks | 3. Basic Network |
Railway construction: Road construction: Waterways construction: Airport construction: General construction: Working with vehicles:
Two Tracks
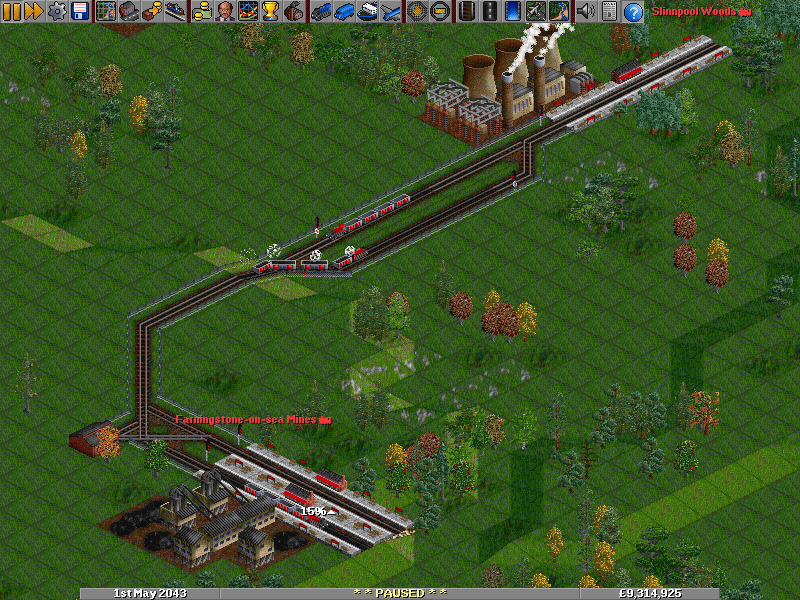
When using a single track for multiple trains between two stations, a train may need to wait for a long time before it can use the track, especially when the track is long. The reason is that only one train is allowed on a single block of tracks (the section of track between two signals) to prevent train collisions.
To solve this, you need double tracks so that trains can pass each other in other places than just the station. One way to do this is to add one or more passing sidings and another way is to just double the complete track.
Partly doubling the track: the passing siding
The passing siding is a short section of track that is partly doubled, guarded by signals. It is a cheap solution, but also causes delays when trains aren't well synchronised.
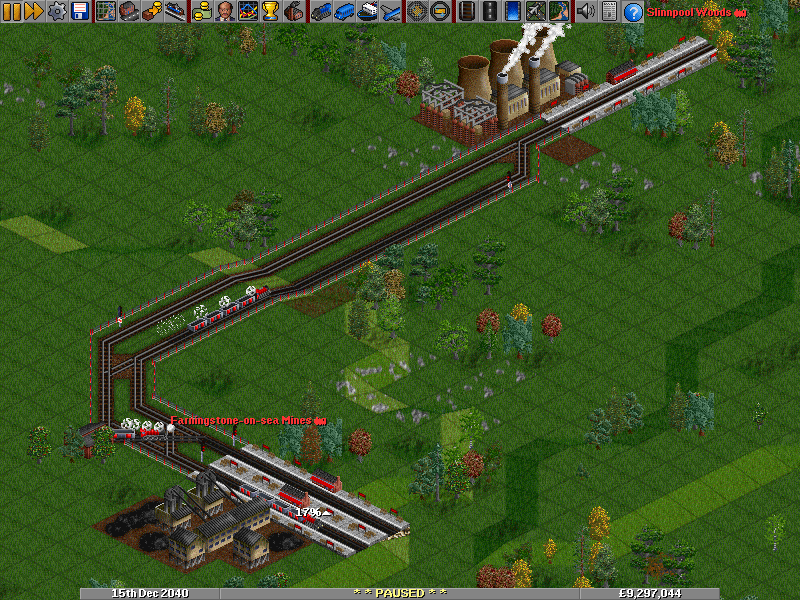
Key to the passing siding is to make it long enough that it can fit the longest train that will use it. Since our platforms are five tiles long, it makes sense to make the passing siding five tiles long as well. Because a signal also occupies a tile, the final result will be somewhat longer.
As for the signals, we'll be using  one-way path signals. You could use two-way path signals, but then in some circumstances, trains will sneak ahead; the one-way path signals prevent this. Remember that it is important to have enough space for a train to wait at a signal, see the example below.

|
|
A passing siding (click to enlarge) |
If you have a longer track than this example, you can add multiple passing sidings at different places along the route. If this isn't enough to handle all your trains adequately, you need to completely double the track.
Completely doubling the track
Double tracks provide a a one-way track in each direction. This means it can handle many more trains, because trains do not run into each other and are not forced to reverse.
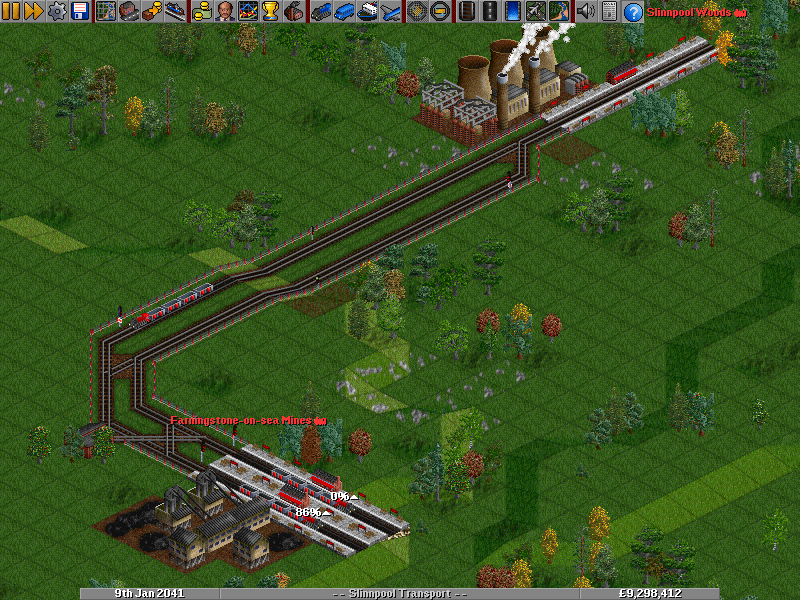
The first step towards doubling the track is basically building a very long passing siding between both stations. This is enough to be able to add a third train, just like with the smaller passing siding.

|
|
Track completely doubled and the third train (click to enlarge) |
This will work for three trains, but now the signals limit the the track to only handling one train in each direction (one towards the mine, one towards the power station). If you have a long track, you want more trains to be able to travel in the same direction at the same time. Now you could add even more parallel tracks, but changing the signal behaviour on the track is far more efficient.
Signals prevent trains from entering sections of track between the signal itself and other signals, if another train is already present. Seeing as there we have very few signals, there are only two sections of track - and this is why only one train can travel in each direction! To fix this, we need to add in more signals to split the sections (or blocks) into smaller ones.
So that's what we'll do: add more signals. For this you can use either of the two signal types, but because we don't need the path magic for a piece of track without junctions we can also use the most basic signal type. This is the standard block signal and can be found at the very left of the signal selection toolbar:  .
.
The signal distance (or density) isn't really important here. If you want a somewhat realistic look, choose a signal distance of at least the train length. If you want a slightly higher capacity, place signals very close to each other. In either case it's important to remember to only place a signal where you want a train to wait! You should never have a signal immediately after a junction, because it could block the junction if a train waits there. In our example you need to count five tiles from either junction and place the signal on the sixth tile. That way, a train waiting at that signal will never block the junction!
Select the signal you want to build and click the tile you want the signal on. The standard block signals are two-way by default. Click the tile with the signal again (with the signal tool active) to make it one-way. Click once more to make it one-way in the other direction. Trains can never pass the one-way standard block signals from the other side. At first this may not be very clear from the signal graphics. However, the block signals are smaller and show a green light when there is no train blocking the section after the signal. The path signals are taller and show red until a train reserves a path through the signal. If this is too confusing for you, just use path signals only; the same rules for where to place them apply.

|
|
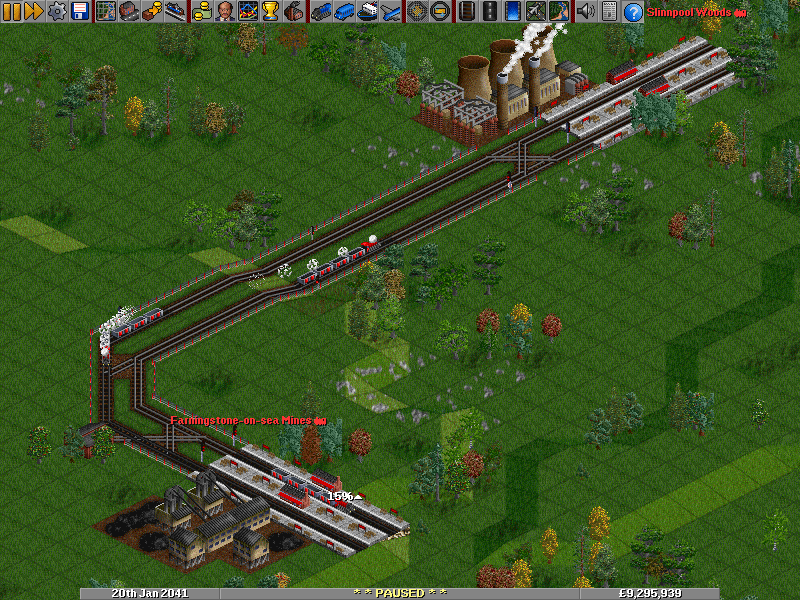
Double track with intermediate signals. Path signals will also work on these positions (click to enlarge) |
Got this? Great! In this particular example there now is room for six trains (although four trains will work much better, try it yourself!). We have one dedicated track for trains going towards the power plant and a second dedicated track for trains returning to the coal mine. The signals split the track into multiple sections to allow more trains.
Second second platform
We've already built a second platform at the coal mine, but if traffic gets really heavy, you might want a second platform at the power plant as well. The principle is the very same as at the coal mine and you'll certainly be able to build that without further instructions.

|
|
Second platform at power plant station (click to enlarge) |
If the distance between both stations is (much) longer, you should consider adding a depot to the other side of the track as well. If you play with vehicle Breakdowns enabled, this provides a second opportunity for trains to be serviced, resulting in less frequent breakdowns.
Next: Building a basic network »


