It has been suggested that this page be split into multiple pages.
There seem to be two topics here, Network Capacity and Network Optimisation, that would be better served in seperate (and shorter) articles.
- Signals · Stations · Junctions · Carrying capacity · Rail Designs & Tips
Contents |
Carrying capacity of your network
This page is intended as a theoretical treatment purely of carrying capacity. Junctions and networking are much more important. Disclaimer over, let's consider the various factors that affect your carrying capacity.
Signal distance (SD)
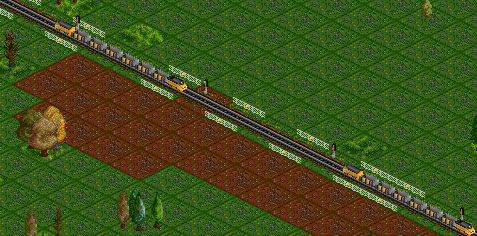
This is a fairly obvious one. Widely-spaced signals will result in a lower carrying capacity. With an SD of one signal every N tiles, the minimum gap between two full-speed trains can never be less than N+1 (Figure 1). On diagonal track one signal every 2N "half tiles" or N "full tiles" the minimum gap cannot be less than 2N+1 "half tiles" or N+1/2 "full tiles". When trains are this close together, you have reached the theoretical maximum train density. In practice, reaching this density is impossible.
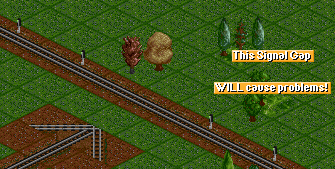
One important consideration is consistency. The capacity of a track is determined by whichever individual signal gap is the largest. Thus, a track with one signal every two tiles, that has an anomalous one-off gap of three or four tiles, will suffer from greatly diminished capacity and can potentially jam and violate rule 1 (Figure 2). Remember that this also holds for corners and splits/merges.
Diagonal track
In OpenTTD, trains move slower on angled track (thanks SmatZ!), and thus require an increased signal density to prevent bottlenecks. It is important that the train gap (not SD) of straight and diagonal tracks is as similar as possible. Otherwise trains can jam either when going from straight to diagonal or from diagonal to straight track.
A quick experiment showed that trains move exactly 25% slower on diagonal tracks. So if using a certain autosignal setting, you will probably need to manually increase the signal density on any angled rail you have.
The following examples have been created under the assumption that the length of the train also changes on diagonal track. This seems to be true for only some NewGRFs! (Iirc, it is true for the JapanSet and wrong for the default trains.)
- An autosignal setting of 3 gives a minimum train gap of 4. This translates to a minimum diagonal train gap of 6 "half tiles", which can be achieved by placing signals with a distance of 5 "half tiles" (or by twice placing signals with an autosignal setting of 5).
- An autosignal setting of 2 gives a minimum train gap of 3. This translates to a minimum diagonal train gap of 4.5 "half tiles". A diagonal train gap of 5 "half tiles" can be achieved by placing signals with a distance of 4 "half tiles" or with an autosignal setting of approximately 2. A diagonal train gap of 4 "half tiles" can be achieved by placing signals with a distance of 3 "half tiles" (or by twice placing signals with an autosignal setting of 3). Though this SD doesn't have a exact counterpart on diagonal track the deviation between straight and diagonal track is just 1/3 tile and the same autosignal setting can be used for straight and diagonal track.
- An autosignal setting of 1 gives a minimum train gap of 2. This translates to a minimum diagonal train gap of 3 "half-tiles", which can be achieved by placing signals with a distance of 2 "half tiles" or with an autosignal setting of 1. Here the same autosignal setting is used for straight and diagonal track, too.
So what signal distance should I use?
-
Two tiles
A SD of two gives a minimum gap of 3, and is the optimal practical solution.
-
One tile
A SD of one is fraught with problems. Even a track split causes a signalling gap. It would be possible to join angled rails with a signal gap of 1, but this would result in a considerable increase in build complexity.
-
Half tile
Angled track is capable of double density signals. This may be of theoretical interest, or for shaving a few millimeters off a near-miss situation. The biggest flaw with a half tile SD is obviously that every straight piece of track will have a bigger SD.
Whatever SD you choose, keep in mind that you have to be consistent. A network with SD of 2 and a signalling gap of 3 on a frequently used track can lead to jams. It might therefore have a lower capacity than a network with a consistent SD of 3!
Train length (TL)
This is a double-edged sword. A longer train will increase the likelihood of incurring a realistic acceleration penalty, making construction more spread out and complex. However, a longer TL increases the maximum cargo capacity of your network. Note that when using engines that have a front and rear sections, the additional 1/2 tile taken up makes shorter train lengths even less favourable.
For high-speed networks typical values of three to five tiles are normal, with four being a particular favourite, because on a track with a SD of 2 a line of TL-4 trains accelerating from standstill has a lower reaction time than trains with uneven TL.
Quantifying carrying capacity
Train Density (TD)
Your network will carry a certain number of trains, and assuming you have a standardised train length, we can define some metrics. The Train Density (TD) for a track is given in units of trains per thousand tiles, and can be calculated by counting the number of trains on that track and dividing by the length of the track.
Typical measured values for an unoptimized network of 4-tile trains are a TD of 25 (trains per 1000 tiles).
The maximum TD before traffic jams become self-propagating can be measured by permitting a queue of trains to accelerate from a halt and then measuring the train-train distance when all trains have reached full speed, and using the formula
1000 / (TL + train gap)
This critical TD depends on the power and number of the engines, the weight of the train, the top speed, the SD and the length of the train. Because this critical density incorporates information about acceleration and time to reach top speed, it can also tell you about the practical maximum capacity of your network. For example, using trains with a lower top speed actually makes it easier to have a dense network. The average train-train gap is much smaller for rail than for monorail or maglev. Slow doesn't mean better, however, as the reduced line density will be more than compensated for by quick turnaround times.
For example, a fully-laden 4-tile Chimaera (top-end MagLev) was found to have a train-train distance of 12, giving critical density of 1000/16 or 62.5. Repeating the previous example but using the electric rail T.I.M. gives a train-train distance of only 6, and a critical density of 100.
It is possible to run a network at higher than the critical density, but it is ill-advised.
Theoretical Maximum Train Density
Simply put, this is the train density if your network is entirely filled with trains at the minimum distance between each other. You will never reach this.
This is given by 1000 / (TL + SD + 1)
For example, 4-tile trains and a signal distance of 2 will give a theoretical maximum train density of 140.
Carrying Capacity (CC)
Since TL alters the carrying capacity of a line, comparing TD across different TL is meaningless. In order to compare efficiency figures between different personal preferences, we need a new metric. This new metric will simply be a measure of how many units of cargo your network is transporting per year, per track. It will be directly proportional to the average quantity of cargo per track tile, and also to how fast this cargo is moving.
CC_day = TC / ( TL + TD ) * v_travel
CC_day = TC / ( TL + TD ) * v_kmh * 74*2/16/256*1.00584
CC_day = TC / ( TL + TD ) * v_mph * 74*2/16/256/1.6
CC_day = carrying capacity [in cargo units per day] is how much cargo can cross each tile in one day. This amount of cargo can be fed to the start of the line and delivered at the end of the line.
TC = train capacity [in cargo units], how much cargo one train can carry.
v_travel = speed [in tiles/day], v_kmh = speed [in km/h] and v_mph = speed [in mph] is the speed of the train.
TG = train gap [in tiles]. For track layouts which don't inject trains to form a high-density-stream this is the critical train gap.
TL = trainlength [in tiles].
The Chimaera from the above example has a carrying capacity of
CC_day=47*6*402/16*0,0056=40 Passengers/day
or
CC_day=27*6*402/16*0,0056=23 Bags of Valuables/day
The T.I.M. from the above example has a carrying capacity of
CC_day=40*6*150/10*0,0056=20 Passengers/day
or
CC_day=20*6*150/10*0,0056=10 Bags of Valuables/day
Work on this unit is pending.
Making your network more efficient
Ok, so now that we've defined the parameters that we had already intuitively understood, how can we use them to improve our networks? The golden rule number 1 of network optimisation is that trains on the network never slow down. There are two possible parts of a network where this could happen, splits and merges.
Splits
For a track split, one must ensure that there is not a longer-than-normal signalling gap at the split point. This can be taken care of by careful or over-abundant signalling.
Merges
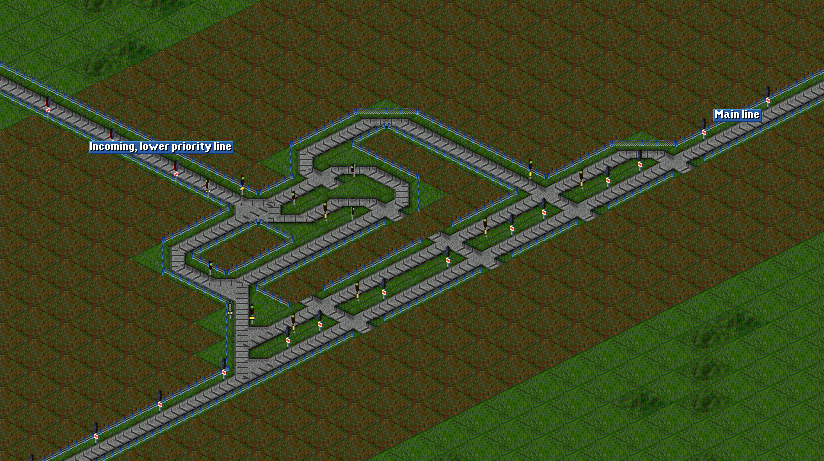
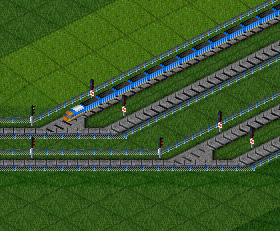
Merges present us with a unique problem. For a trivial merge, trains on the mainline could potentially be stopped by a sideline train. The solution is to give trains on the main track priority over the joining trains with a Priority Merge.
Consider a typical non-junction merge, at the exit of a pickup station. A tightly-packed optimised stream of trains enters the station, but because of differences in loading times, this order is disrupted on the station exit, and you end up with two tracks of loosely-packed trains. One of these lines, designated the main line, will have, on average, train-train gaps large enough to fit a third train into. Simply connecting the two lines together will not work, and a priority merge is required.
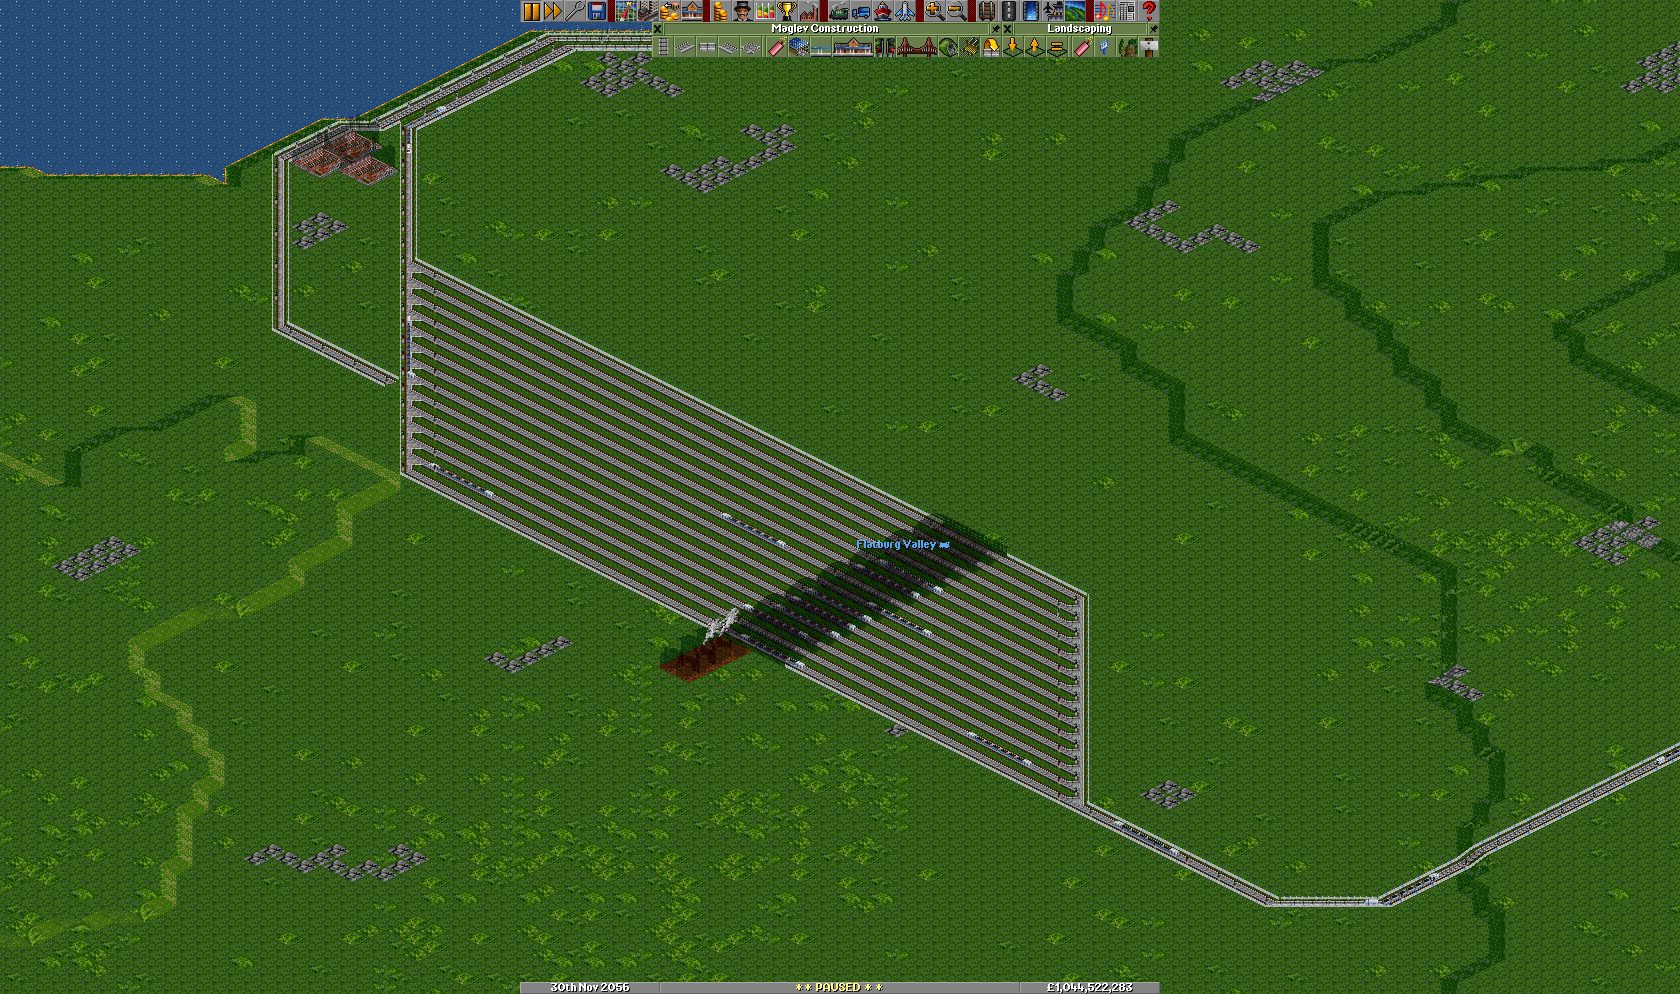
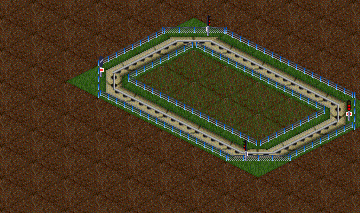
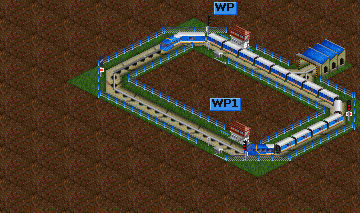
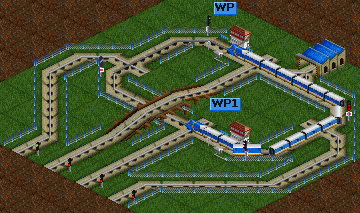
Note that, because trains that drop off cargo always spend the same length of time at a platform, it is possible to dematerialise and reassemble a tightly packed stream of trains, even one above the critical density! (Figure 3)
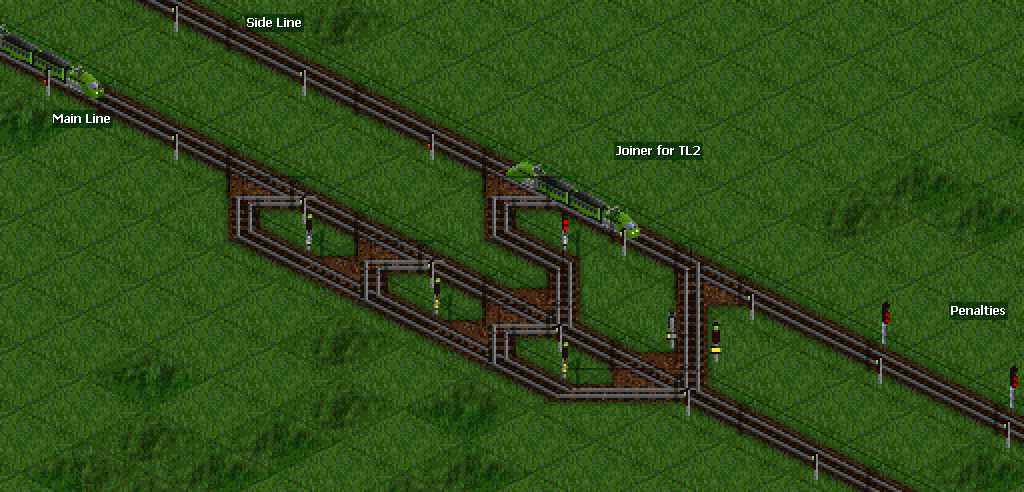
A first-pass merge using a priority block will reduce the traffic ratio from 1:1 to about 3:1 in favour of the main track (Figure 4). Adding a second priority merge straight after the first one would be a futile gesture, since trains on both lines would continue at the same speed and the mainline train would simply claim priority again. Introducing a delay by a loop of track, followed by a second priority merge, will reduce the sideline to a mere trickle of trains and will have filled in most of the available slots on the mainline. Existing solutions would involve a pre-acceleration track, however a cyclotron eliminates the need to lose momentum.
Cyclotrons
See main article [[en/Community/Junctionary/Cyclotron]]
A cyclotron is a priority merge with a loop, so that a train can wait for a slot on the mainline at full speed.
Trigger
A trigger allows to control when a train may leave the station. This increases the capacity of the track significantly. You can use the trigger to have several trains leave the station at a defined time gap. After they have accelerated, you can merge them to a single track. As the gap between them is always equal, the merge will always succeed.
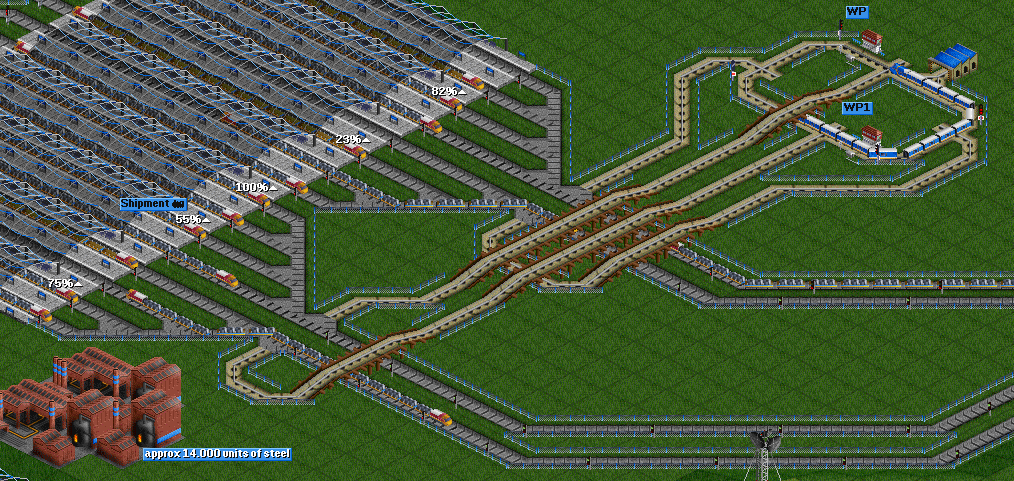
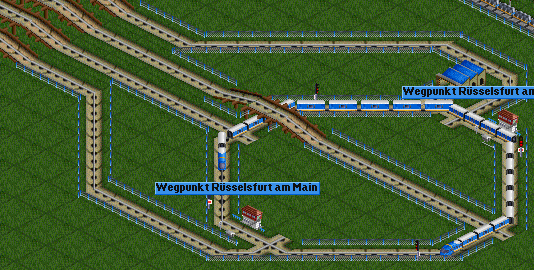
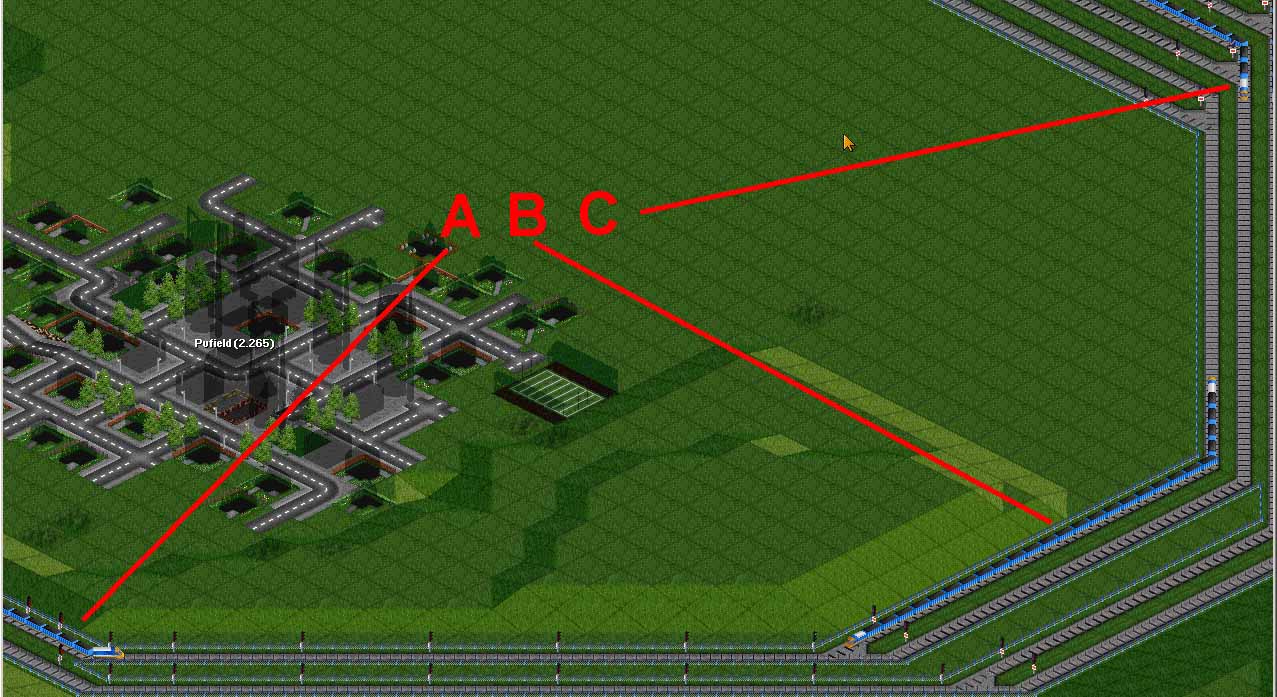
This set of screenshots shows the trigger itself. The main component is a circle track (A). It is divided into four segments using path based signals. A train travels the circle (B). Two waypoints are used to keep it moving. The length of the train is such that it almost covers three segments of the circle. Finally, each segment has an exit (C). To show the concept, a traffic light has been added to each track. When the train moves, each of the lights will shortly jump to green.
Now the trigger is connected to a high yield station. The station has 16 platform each 9 tiles in length. Four tracks leave the station. Later they are merged to two track:
Notice how the monorail an the magnetic tracks are connected. Each track leaving the station is connected with one segment of the trigger. Right after this connection a normal signal is placed. This way the trigger is able to stop trains from exiting the station.
Timing in this setup is crucial! Depending on the type and size of trains the exact size of the trigger must be changed. Steel trains are heavy. Hence the trigger must be slow. This is achieved by having very sharp turns in the trigger's circle tracks. As a result, the train travels at 131 km/h.
At a similar station, there are also 16 platforms each with 9 tiles. But the trains transport goods which are much lighter than steel. Hence the trigger's time gaps can be shorter. This is achieved by having a circle track with less sharp turn. As a result, the train travels at 226 km/h.
Step-by-Step-Merge
A Step-by-Step-Merge is an easy way to merge several tracks, usually from a station, one by one into each other, until only the main line is left.
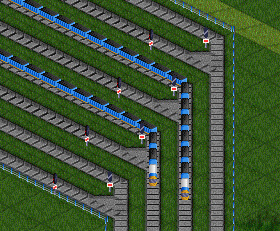
The first task is to get trains out of the station as quickly as possible. Platform room is precious, and a train needs to clear the station completely, before the next one can enter. We do this by providing one exit lane for every platform, and it should be about 150% of the length of the longest train. Add a path signal on the first track behind the station in order to clear the platform for the next train. Common errors here might be to miss one of the path signs, or designing the exit lanes too long or too short.
Next we start with a merge. You can merge on a straight track, but it's easiest and usually most efficient to merge in a turn. Make sure to place a path signal on every exit lane, as close to the merge as possible - but do not place a signal after the merge. Make sure that there is again plenty of room for trains to accelerate after every merge, about 150% of the longest train. Do not place any additional signals here, not even pathing signals. All following merges are designed the same way.
The nicest aspect about this merge layout is, that it actually works best under high traffic or even jam conditions: Once one train [A] clears the merge, the other tracks train [B] is allowed to accelerate. But the first train also cleared it's own segment, which permits one of the trains [C] from the merge behind to accelerate. Thus, you have two trains accelerating at the same time. This way, trains synchronize up to the station.
The example shown here handles traffic generated by 80 trains and 25000 crates of goods.


